Table of Contents
Installing Chocolatey on Windows is one of the easiest ways to manage software through simple commands, and this guide walks you through every step in a clear and beginner-friendly way so you can use it confidently.
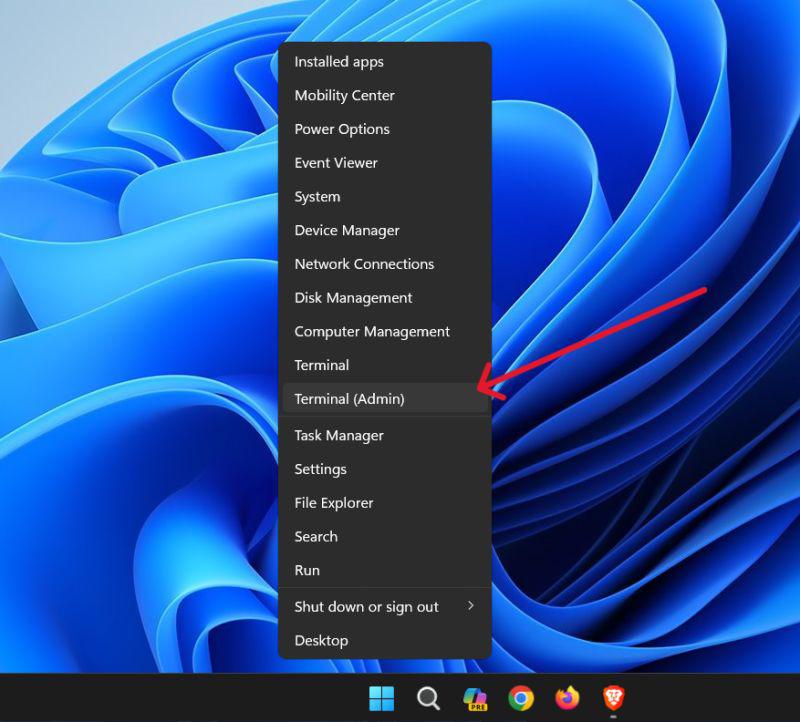
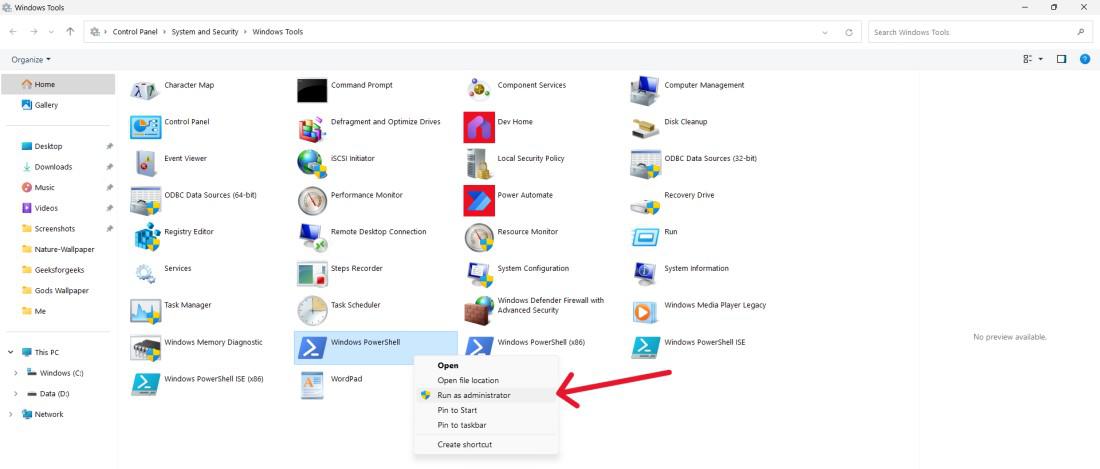
Step 1: Open PowerShell as Administrator
To install Chocolatey safely, you must use an elevated PowerShell window because it allows the installer to configure system-level components correctly.
1.Terminal (Admin)
2.Search for PowerShell
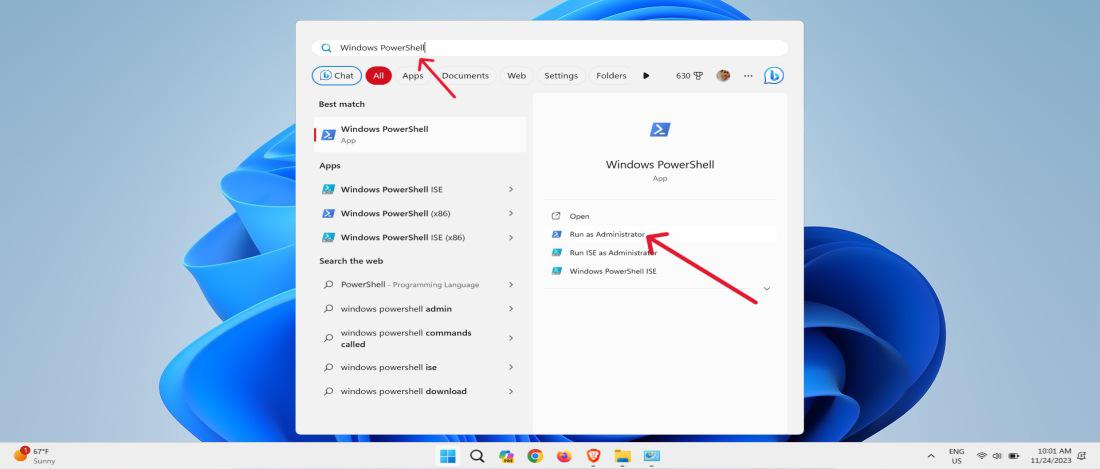
3.Right-click Windows PowerShell → Run as Administrator
Step 2: Enable PowerShell Execution Policy
Chocolatey requires permission to run installation scripts, so you need to temporarily change your script execution policy.
Set-ExecutionPolicy Bypass -Scope Process -Force
Step 3: Install Chocolatey
Now run the main installation command, which downloads and installs Chocolatey automatically.
Set-ExecutionPolicy Bypass -Scope Process -Force; `
[System.Net.ServicePointManager]::SecurityProtocol = `
[System.Net.ServicePointManager]::SecurityProtocol -bor 3072; `
iex ((New-Object System.Net.WebClient).DownloadString('https://community.chocolatey.org/install.ps1'))
Step 4: Verify Chocolatey Installation
After completing the installation, it’s important to verify that Chocolatey is correctly added to your system so you can ensure everything is working smoothly before installing any packages
choco -v
Step 5: Install a Package Using Chocolatey
Once Chocolatey is properly installed, you can start using it to quickly install software from the command line, making package management faster and more efficient on Windows.
choco install googlechrome -y
Step 6: Update Chocolatey
Keeping Chocolatey updated ensures you always have the latest features, security improvements, and compatibility fixes, helping your system stay reliable and efficient.
choco upgrade chocolatey

Need a Windows Server?
DropVPS Windows VPS gives you full Admin RDP access, instant setup, and dedicated resources — run any Windows workload without limits.
- Full Admin Access
- RDP Ready Instantly
- Dedicated Resources
- 24/7 Support
No commitment · Cancel anytime